
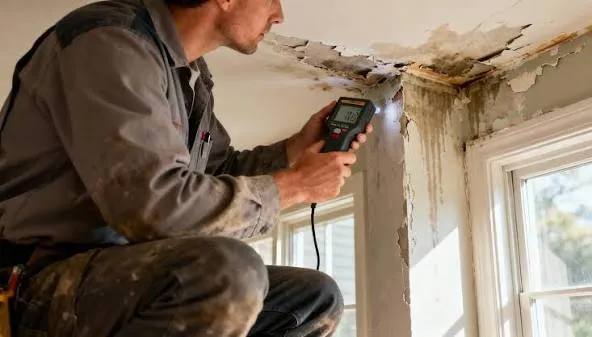
3 Ways to Spot a Hidden Water Leak Behind Your Drywall Before Dangerous Mold Takes Over
Why hidden leaks behind drywall turn into expensive callbacks fast
A leak behind drywall is the worst kind of leak because it’s doing damage while the room still looks “fine.” For a GC or high-end remodeler, that turns into the kind of callback nobody has time for: wet insulation, stained finishes, warped base, and a homeowner asking why nobody caught it sooner.
The real problem isn’t the drip. It’s what comes next:
Mold growth in dark wall cavitiesRotting studs and subfloor edgesRuined paint, trim, and flooring transitionsSchedule delays from drying and remediationReputation hits with the homeowner
In the North Metro, we see these hidden leaks show up after freeze-thaw seasons, during basement finishes, and in older homes where fittings or shutoffs have been “good enough” for years.
Common leak sources in North Metro homes and remodels
Supply fittings at toilets and vanitiesOld solder joints and pinholes in copperPEX connections that weren’t crimped cleanlyTub and shower valve bodies or drop-ear elbowsDrain leaks at traps, hubs, or shower pans
Way #1: Read the wall like a pro (visual and surface clues)
If you’re Googling how to find hidden water leak behind wall, start with what the finishes are already telling you. Drywall is basically a moisture indicator. It just speaks quietly at first.
Discoloration, bubbling paint, and soft spots
Yellow or brown staining that slowly expandsPaint that blisters, peels, or looks “puffed”Drywall that feels soft, spongy, or crumbly
Tip for remodelers: staining often shows up at seams, corners, and around outlet boxes because those spots telegraph moisture faster than flat field drywall.
Nail pops, baseboard swelling, and flooring changes
Some of the best signs of leaking pipe in drywall aren’t on the drywall at all. Watch the edges and transitions:
New nail pops that weren’t there last weekBaseboard that swells, separates, or cupsFlooring edges that lift or feel “hollow”
If you’re seeing movement at base or casing, the moisture may be traveling down the backside of the drywall and pooling at the bottom plate.
Musty odor patterns that point to a cavity leak
A musty smell that gets stronger when the HVAC runs or when the room is closed up overnight is a solid clue. Mold doesn’t need a flood. It needs time, moisture, and a place to hide.
Quick check: sniff around electrical outlets, return grilles, and baseboards. If one small area smells stronger, that’s often close to the wet cavity.
Way #2: Use simple, low-mess tests to confirm moisture
The goal is confirmation without turning the job site into chaos. You want enough data to act, not a bunch of exploratory holes that create more patch work.
Moisture meter checks on drywall and trim
A basic pinless moisture meter can help you map the wet zone. You’re looking for a pattern, not a single number.
Scan a dry “control” area firstWork toward the suspected leak locationMark high readings with painter’s tape
If the highest readings are concentrated vertically, that can suggest water is running down a stud bay from above. If the readings spread wide at the bottom, you may be dealing with pooling at the base plate.
Temperature and humidity clues (including IR camera basics)
Moist areas often read cooler than surrounding drywall because evaporation changes the surface temperature. An infrared camera can help locate the “shape” of the wet area, especially when the leak is slow.
Cool, irregular patches can indicate moistureSharp straight lines can indicate framing membersConfirm with a moisture meter before cutting
IR doesn’t “see water,” it sees temperature differences. Used correctly, it reduces unnecessary openings and keeps the project moving.
Shutoff and meter tests to identify a supply-side leak
If you suspect a pressurized supply leak, this is one of the cleanest ways to narrow it down:
Turn off all fixtures and appliances using waterCheck the water meter leak indicatorWait 15 to 30 minutes and re-check movement
If the meter is still moving, you likely have a leak on the supply side. If it stops, the issue may be intermittent or tied to a fixture cycling (ice maker, humidifier, softener, or recirc).
Way #3: Listen for the plumbing story (sound and system behavior)
Walls talk. You just need a quiet house and a few minutes of patience.
Running water sounds when fixtures are off
In a quiet room, put an ear near the wall where the plumbing runs. If you hear a faint hiss or steady “shhh” sound with everything off, that’s a classic supply leak sign.
Hissing can indicate pressurized sprayTrickling can indicate a drain-side issueIntermittent sounds can indicate cycling equipment
Pressure drops, air in lines, and recirculation quirks
Some leaks show up as performance problems:
Random pressure drops at multiple fixturesAir sputtering after the system sits overnightHot water that takes longer than usual
Those symptoms don’t automatically mean “leak,” but combined with staining or odor, they help you prioritize where to open up.
Drain vs. supply: how the symptoms differ
This is where a lot of DIY diagnosis goes sideways. Supply leaks can damage drywall 24/7. Drain leaks often show up only when a fixture is used.
Supply leaks: steady damage, meter movement, hissingDrain leaks: show up during showers, laundry, dishwasher runsPan or tile leaks: moisture after use, slow staining over time
What to do the moment you suspect a leak (without creating chaos)
If you’re a GC, your best move is to control the situation and keep the homeowner confident. If you’re a homeowner, the goal is to limit damage and get clear answers fast.
Immediate steps to limit damage
Take photos of stains and surfacesMove valuables away from the wallPull a small baseboard section if needed
If you can safely access the area from an unfinished side (utility room, open basement ceiling, under-stair cavity), that’s often the cleanest way to confirm the source.
When it’s safe to keep water on vs. shut it down
Shut water off if staining is growing quicklyShut water off if you hear active sprayingKeep water on only if you’re actively testing
If you’re unsure, shut it down. There’s no money in the water.
What to document for the GC or homeowner file
When the issue was first noticedWhich fixtures were used around that timeAny meter movement test results
This is the kind of documentation that keeps the project clean from a communication standpoint. Clear notes now prevent finger-pointing later.
When to call a pro (and what a clean diagnosis visit should look like)
If you’ve confirmed moisture or you’re seeing multiple signs of leaking pipe in drywall, it’s time to bring in a licensed plumber. The right pro should minimize unnecessary cutting, communicate clearly, and keep your schedule intact.
Tools and methods that reduce unnecessary drywall cuts
Moisture mapping and targeted access pointsThermal imaging used with verificationPressure testing to isolate supply leaks
Good diagnosis is surgical. The point is to open the right spot once, fix it once, and get drying started immediately.
How MH Plumbing’s “No Chaos” SOP protects schedules and homes
At MH Plumbing, our job isn’t just to fix the pipe. It’s to protect your reputation and your homeowner’s home. That’s what our “No Chaos” approach is built for.
On-time arrivals and predictable schedulingProactive communication with daily updatesSpotlessly clean work areas and respectful access
If you’re a GC, you shouldn’t have to babysit us. We’ll coordinate, document what we find, and keep the handoff seamless. If you’re a homeowner, we’ll treat your place like it’s our own.
North Metro service areas and next steps
We serve North Metro Minnesota, including Blaine, Coon Rapids, Andover, Ham Lake, and nearby communities. If you want a clean diagnosis and a straightforward plan, we can help.
Next step: schedule a leak investigation and we’ll help you confirm the source, stop the damage, and get your project back on track with minimal disruption.
FAQ: Hidden water leaks behind drywall
Can a small leak really cause mold?
Yes. A slow leak that keeps a wall cavity damp is a perfect setup for mold, especially when insulation or paper-faced drywall stays wet.
Will homeowners insurance cover a hidden leak?
Coverage varies. Many policies cover sudden, accidental water damage, but not long-term neglect. Document what you see and call your agent early so you’re not guessing.
How fast does mold grow behind drywall?
Under the right conditions, mold can start growing in as little as 24 to 48 hours. The timeline depends on moisture level, temperature, and airflow.
Is a moisture meter worth buying?
If you manage multiple projects, it can be a useful tool for quick confirmation. For homeowners, it’s helpful too, but it won’t replace proper diagnosis if the leak source is unclear.
